Grounding (or "earthing") is the practice of connecting specific parts of your electrical system to the literal earth (soil). It is the most confusing and often skipped step in DIY solar, but it is critical for safety.
Disclaimer: We are not electricians. Local codes (NEC in the US) vary. Always consult a licensed professional.
Why Ground?
- Lightning Protection: If lightning strikes near your array, grounding gives that massive surge a path to the earth around your equipment, rather than through it (and your house).
- Fault Protection: If a wire chafes and touches a metal frame (like your solar panel rack or inverter case), the frame becomes "live." If you touch it, you get shocked. Grounding ensures that current flows to the ground, tripping the breaker/fuse instantly.
- Static Discharge: Reduces static buildup on panels (which can attract dust/lightning).
Two Types of Grounding
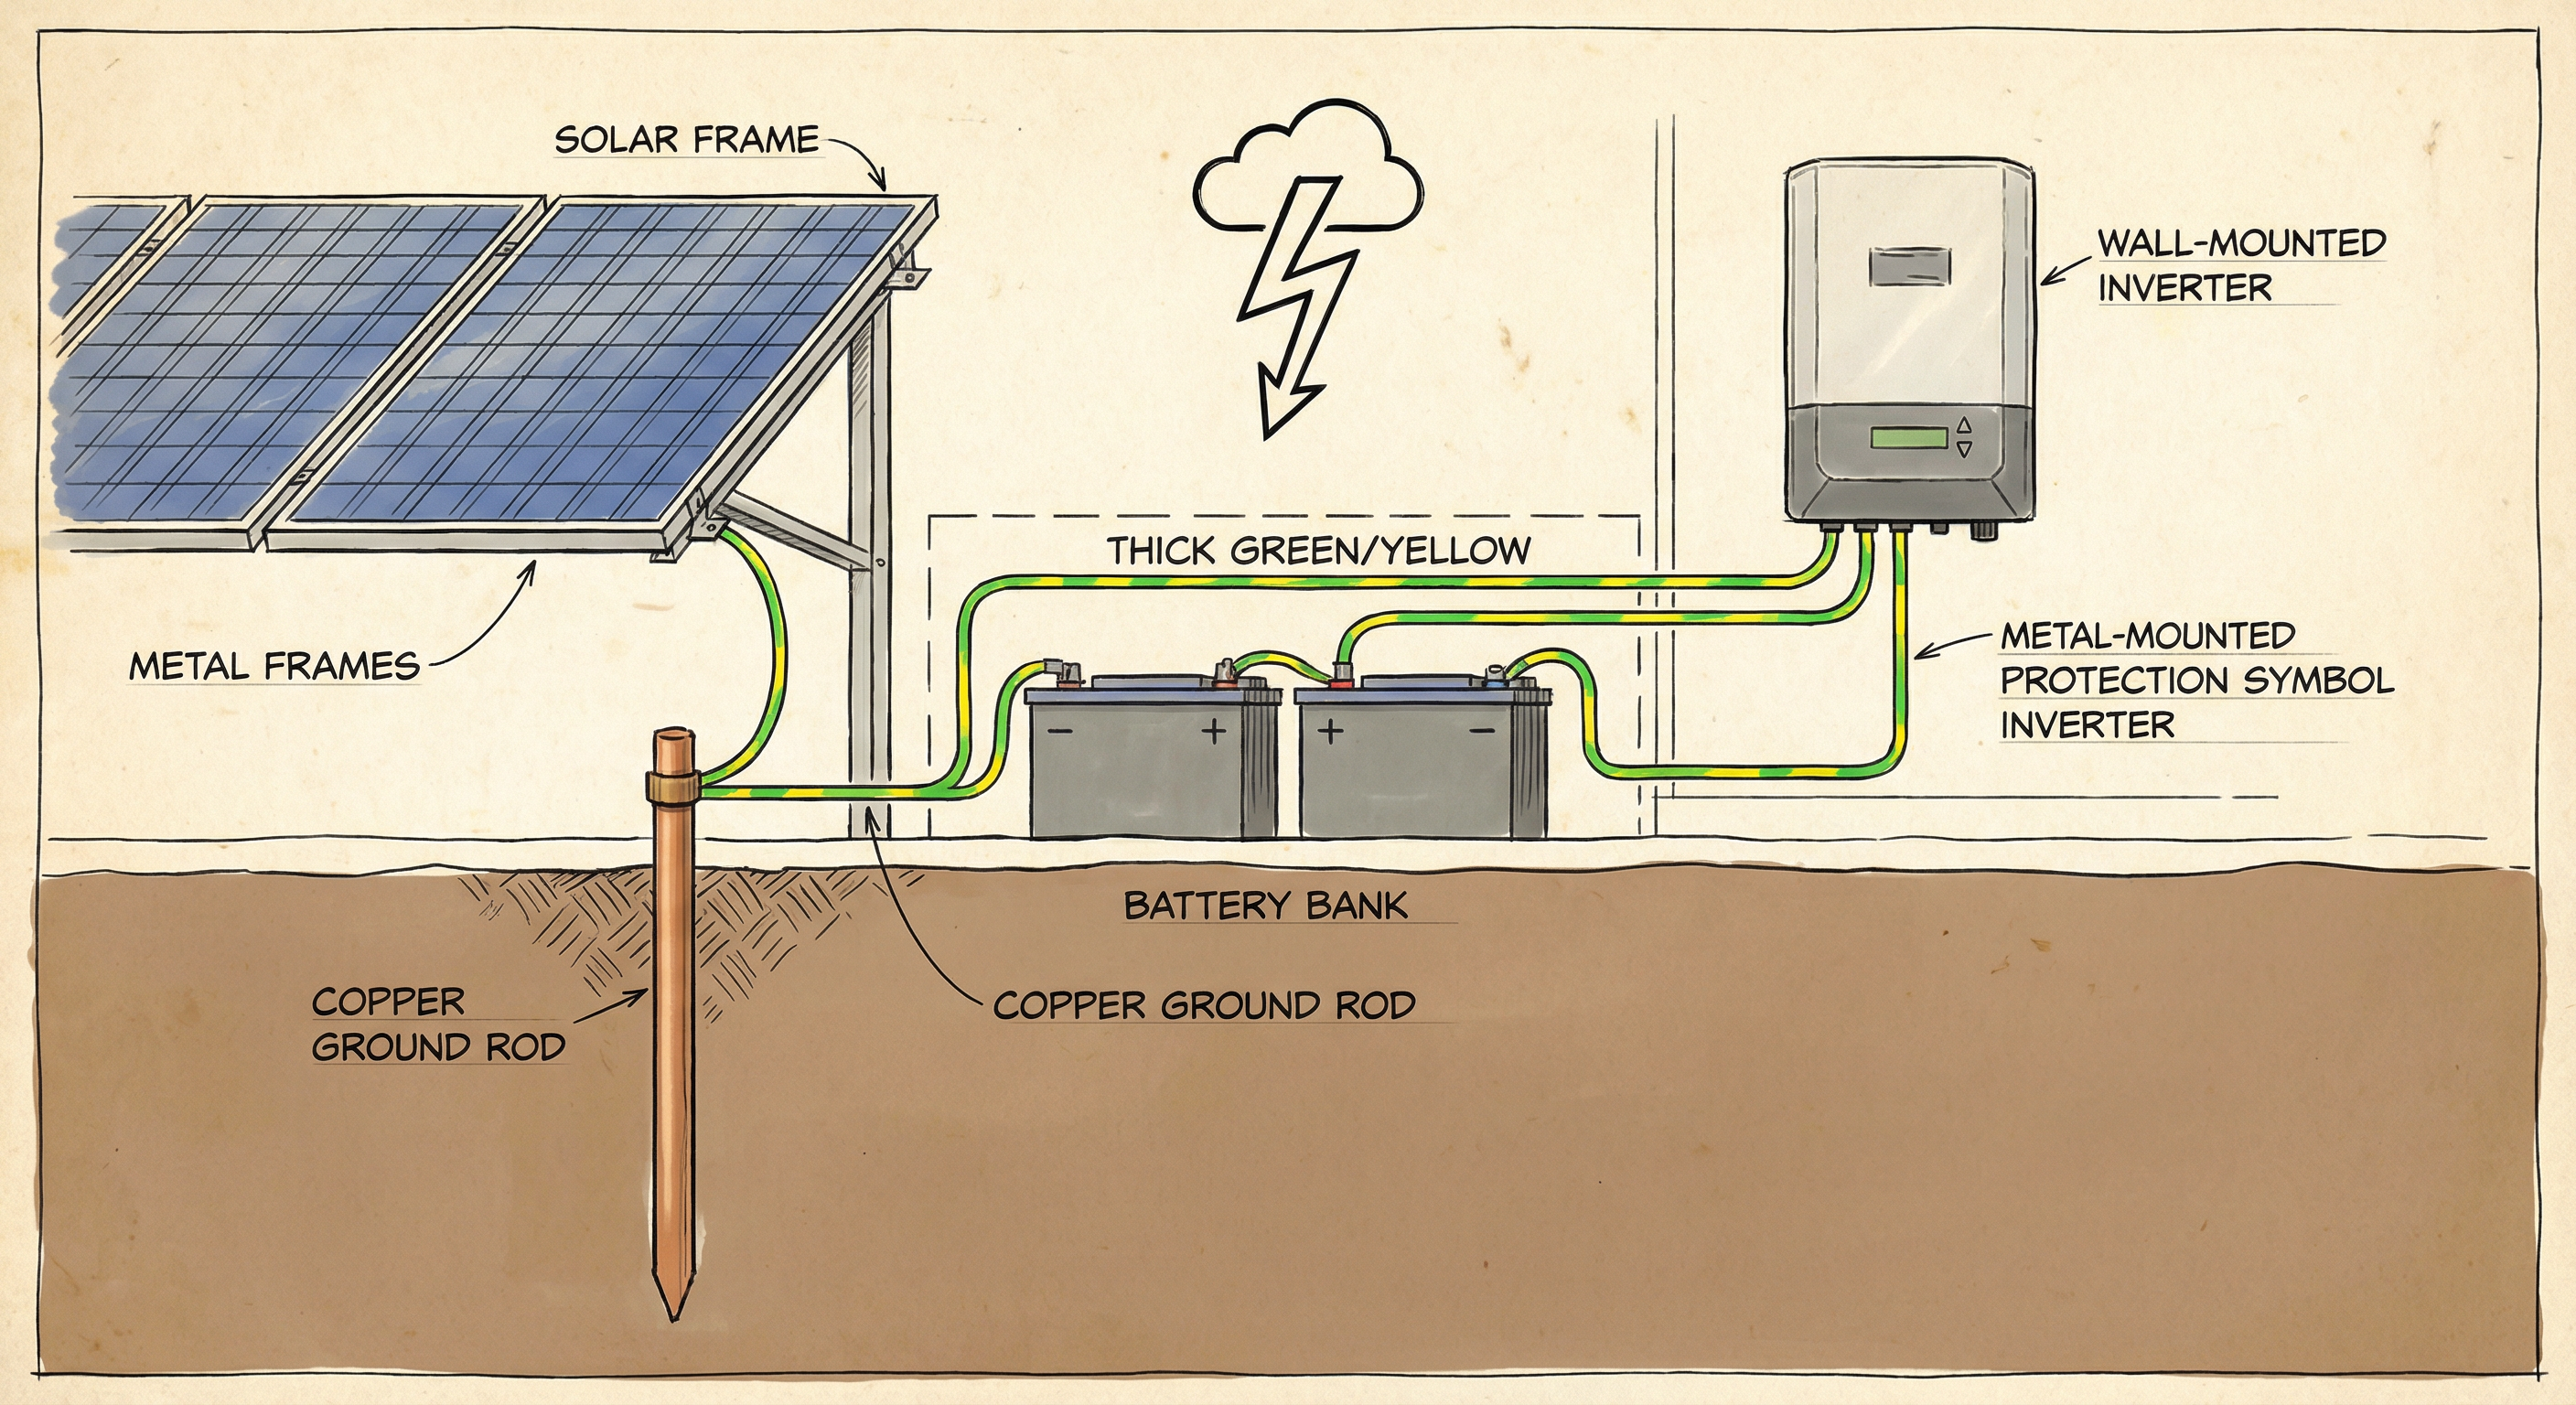
1. Equipment Grounding (The "Green Wire")
This connects all the non-current-carrying metal parts together and then to the ground.
- What to connect: Solar panel frames, mounting rails, inverter chassis, battery box (if metal).
- How: Run a bare copper or green wire from each component to a central "Grounding Busbar," and then to the Ground Rod.
2. System Grounding (The "White Wire")
This connects one of the current-carrying conductors (usually the Negative) to the ground.
- Negative Grounded System: The Negative busbar is connected to the Grounding busbar at ONE single point.
- Floating System: Neither Positive nor Negative is connected to ground. This is common in small 12V mobile setups (vehicles) but less common in large residential off-grid systems. Check your inverter manual—some require floating, some require grounded.
The Ground Rod
The ultimate destination for all this current is the Ground Rod.
- Standard: An 8-foot copper-clad steel rod driven fully into the earth.
- Location: Ideally near your main electrical panel or array.
- Connection: Use a heavy-gauge bare copper wire (usually #6 AWG or larger) and an "acorn clamp" to connect the wire to the rod.
Grounding Steps for a Typical Cabin
- Drive the Rod: Hammer the 8ft rod into the ground.
- Panel Frames: Use grounding lugs (like Weeb clips or lay-in lugs) to connect every solar panel frame to a continuous bare copper wire. Run this wire down to your combiner box or directly to the ground rod.
- Combiner Box: Inside the box, connect the equipment ground wire to the ground busbar.
- Inverter/Controller: Connect the chassis ground screw (usually marked with a ground symbol) to your central ground busbar.
- Main Panel: Connect your AC ground busbar to the ground rod.
Common Mistakes
- Ground Loops: Creating multiple paths to ground can cause interference and voltage differences. All grounds should ideally converge at one single point before going to the rod.
- Using Plumbing: Do not use water pipes as your only ground. Use a dedicated rod.
- Undersized Wire: The ground wire must be large enough to handle a fault current. #6 AWG is a safe standard for most residential systems.
Conclusion
Grounding is your insurance policy against fire and shock. It doesn't make the system run better, but it keeps you alive.
For more safety components, check out Fusing and Breakers for Solar Systems.


