Adding solar to an RV gives you the ultimate freedom: boondocking. No more crowded RV parks, no more loud generators. Just you and nature.
But RV solar is different from residential solar. You have to deal with highway winds (70mph+), constant vibration, limited roof space, and partial shading from trees.
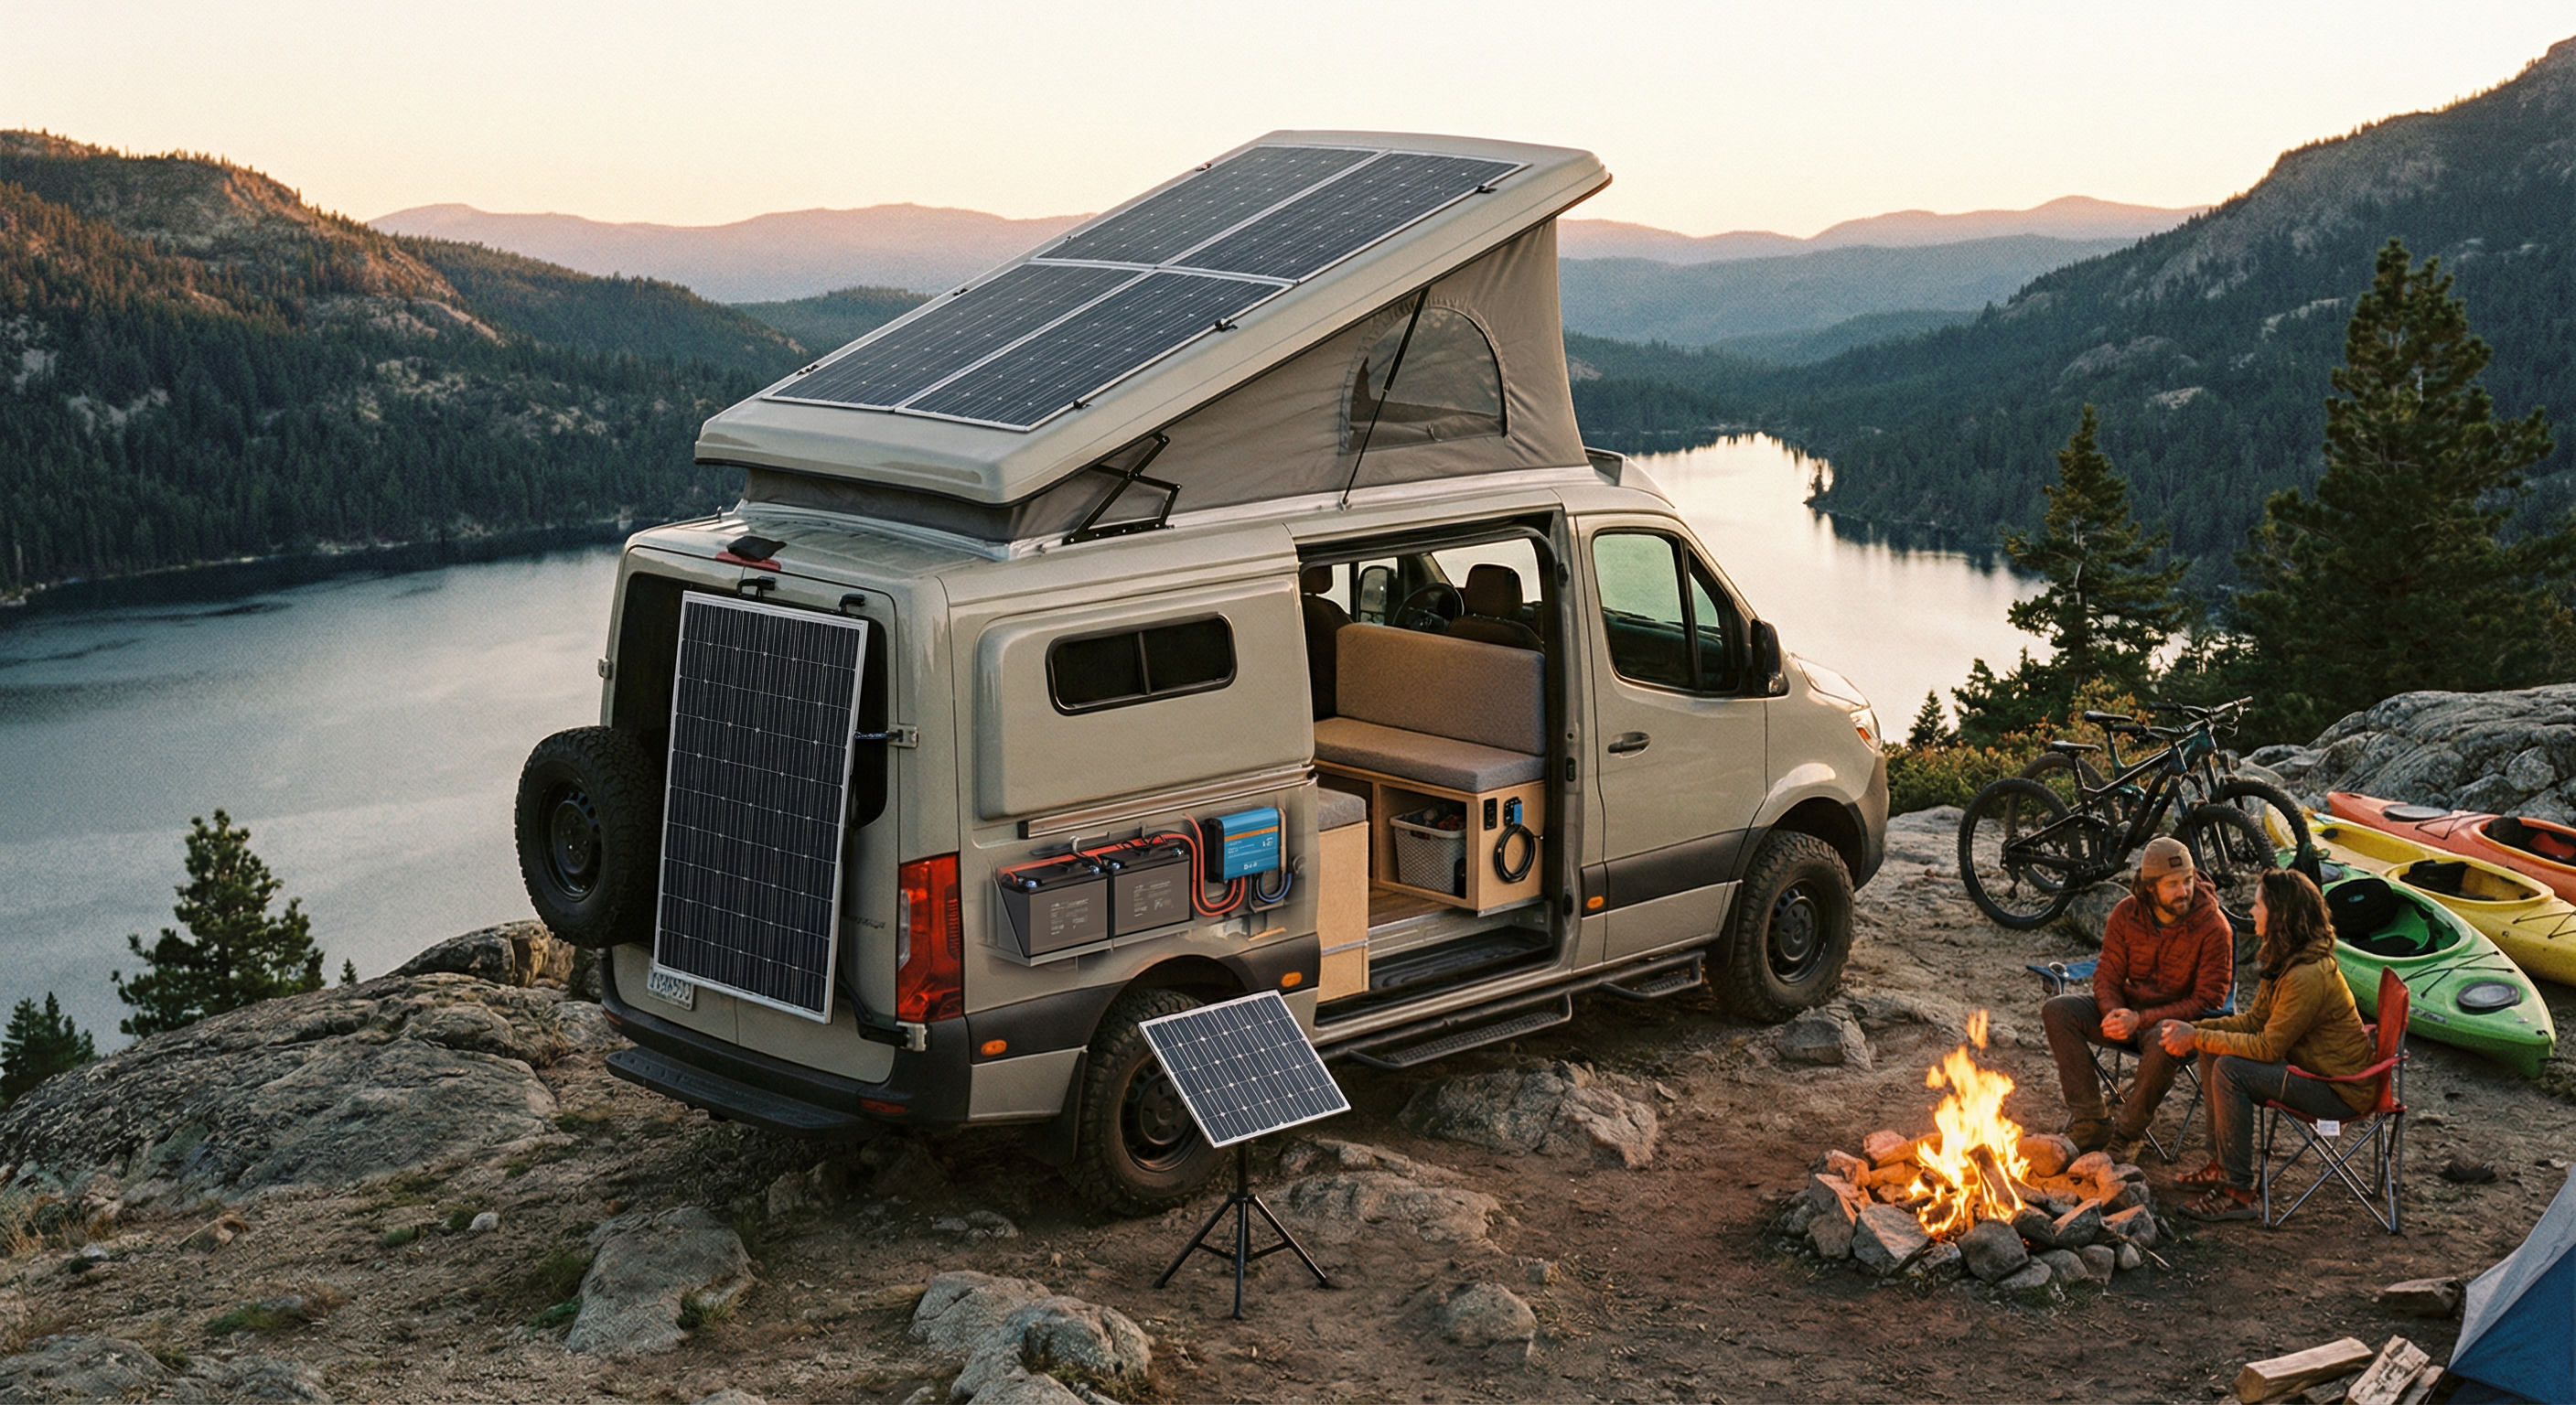
1. Panels: Rigid vs. Flexible
Rigid (Glass/Aluminum Frame)
- Pros: Durable (20+ years), efficient, air gap underneath keeps them cool.
- Cons: Heavy, requires drilling or special brackets.
- Verdict: Best for 90% of RVs. Use Z-brackets or ABS mounts.
Flexible (Thin Film)
- Pros: Lightweight, aerodynamic, glues directly to the roof (no drilling).
- Cons: Overheats easily (glued to hot roof), degrades faster (3-5 years), expensive per watt.
- Verdict: Only use on curved Airstreams or teardrop trailers where rigid panels won't fit.
2. Mounting: No Holes?
Drilling holes in an RV roof is scary (leaks!).
- VHB Tape: Many people use 3M VHB tape to stick mounting feet to fiberglass roofs. It is incredibly strong. However, for large panels, we recommend at least one screw per foot for safety, sealed heavily with Dicor lap sealant.
- Roof Rack: Mounting panels to a roof rack allows for better airflow and no holes in the actual roof material.
3. Wiring: The Roof Gland
Getting the wires from the roof to the inside requires a Solar Entry Gland.
- Drill a hole (scary, I know).
- Pass wires through the gland.
- Seal the gland to the roof with Dicor or Sikaflex.
- This ensures a watertight seal.
4. Batteries: Weight Matters
RVs have a Gross Vehicle Weight Rating (GVWR).
- Lead Acid: Heavy. A 400Ah bank can weigh 300lbs.
- Lithium (LiFePO4): Light. A 400Ah bank weighs ~100lbs. Switching to Lithium is the best upgrade for an RV. It saves weight for water, gear, and food.
5. Charging from the Alternator (DC-DC)
While driving, your RV engine can charge your house batteries.
- Old Way: A simple relay/isolator. This is bad for Lithium batteries (can burn out the alternator).
- New Way: DC-DC Charger. It limits the current (e.g., to 40A) and boosts the voltage to the correct profile for Lithium. Highly Recommended: A 40A-60A DC-DC charger ensures you arrive at camp with full batteries.
6. Inverter Installation
Mount the inverter as close to the batteries as possible (to keep cables short and thick) but NOT in the same compartment if using lead-acid batteries (gases can corrode electronics). Lithium is sealed, so it's safer.
7. Shading Issues
RVs are often parked under trees.
- Series Wiring: Bad for RVs. One shaded panel kills the whole string.
- Parallel Wiring: Best for RVs. If one panel is shaded, the others keep working.
- Tilt Mounts: Consider mounts that let you tilt panels towards the sun in winter. It can boost output by 30%.
Conclusion
RV solar is a project that pays for itself in campground fees saved. Start small (200W + 100Ah Lithium) and expand as needed.
For a detailed look at mounting options, see DIY Solar Mounting Systems: Roof vs Ground Mount.


