Starlink has completely revolutionized off-grid living, RVing, and vanlife. The ability to get high-speed, low-latency internet in the middle of a desert or deep in a forest was unthinkable just a few years ago.
However, this incredible connectivity comes with a significant catch: Starlink is an absolute power hog.
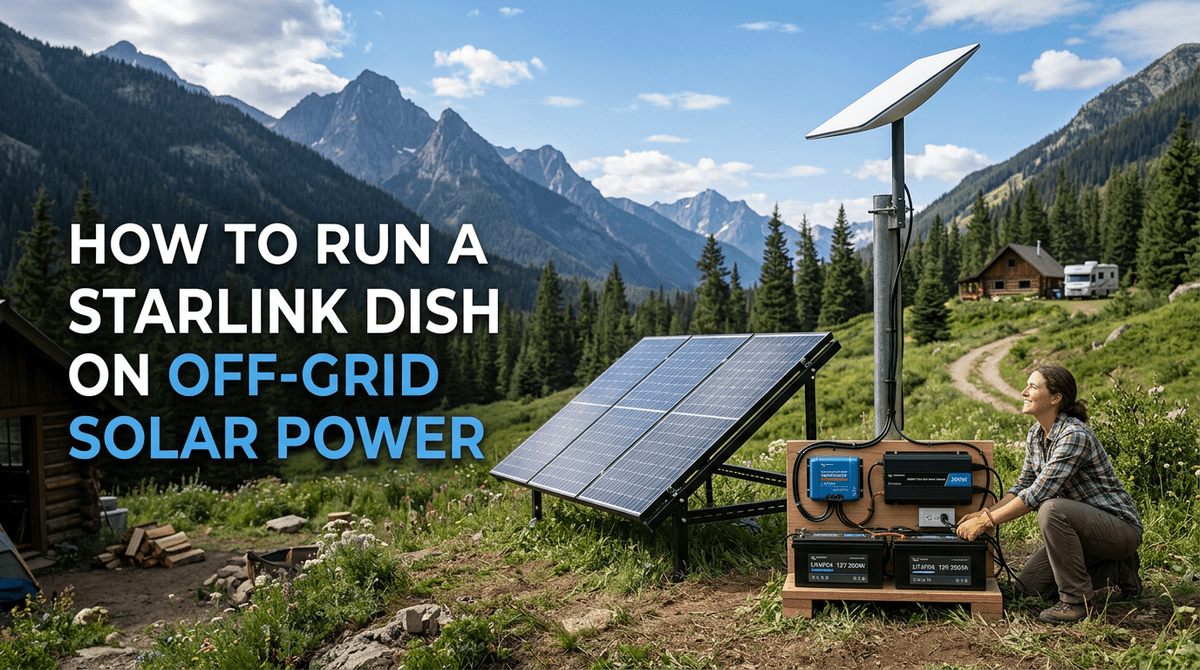
If you are trying to run a Starlink dish (Dishy) on a small off-grid solar setup, you will quickly discover that it can drain your battery bank faster than almost any other appliance, save for a refrigerator or an air conditioner.
In this comprehensive guide, we will break down exactly how much power Starlink uses, how to size your solar panels and battery bank to support it, and the ultimate hack for off-grid users: converting your Starlink router to run directly on 12V DC power.
If you want to see exactly how Starlink fits into your overall energy budget, be sure to use our Off-Grid Solar Calculator.
How Much Power Does Starlink Actually Use?
The power consumption of Starlink depends heavily on which generation of hardware you own and what the dish is currently doing (booting up, searching for satellites, or actively downloading).
The Hardware Generations
- Gen 1 (Round Dish): The original round dish was notoriously power-hungry, drawing a continuous 100W to 120W. If you run this 24/7, it consumes a massive 2,400 to 2,880 Watt-hours (Wh) per day. For most small solar setups, this is completely unsustainable.
- Gen 2 (Standard Rectangular Dish): This is the most common dish currently in use. It is significantly more efficient, drawing an average of 50W to 75W during normal operation. Over 24 hours, this equates to 1,200 to 1,800 Wh per day.
- Gen 3 (Standard Kickstand Dish): The newest standard dish draws roughly 75W to 100W. While slightly higher than Gen 2, it offers better performance and a built-in Wi-Fi 6 router.
- High-Performance / Flat High-Performance: Designed for in-motion use on RVs and boats, these dishes draw 110W to 150W continuously.
The "Snow Melt" Feature
All Starlink dishes have a built-in heater designed to melt snow and ice off the surface of the dish. This feature triggers automatically when the dish detects a drop in temperature or signal degradation due to snow buildup.
When the snow melt feature activates, power consumption doubles or triples. A Gen 2 dish can suddenly draw 150W+ continuously. If you are off-grid in the winter (when solar production is already at its lowest), this feature can drain your battery bank overnight.
- Pro Tip: You can manually disable the "Snow Melt" feature in the Starlink app settings. If you are off-grid and power-constrained, you should turn this off and manually brush the snow off the dish if necessary.
Sizing Your Solar System for Starlink
Let's assume you have the most common setup: a Gen 2 Rectangular Dish drawing an average of 60W.
Calculating Daily Energy Consumption
If you leave Starlink on 24/7, the math is simple: 60 Watts × 24 Hours = 1,440 Watt-hours (Wh) per day.
To put that in perspective, 1,440 Wh is more energy than a highly efficient 12V portable refrigerator uses in three days. It is a massive daily load.
Sizing the Battery Bank
Your battery bank needs to store enough energy to run Starlink (plus your other appliances) through the night and during cloudy days.
If Starlink alone uses 1,440 Wh per day, you need a battery bank that can provide at least that much usable capacity.
- Lead-Acid (AGM): Because you can only discharge lead-acid to 50%, you would need a 2,880 Wh battery bank (roughly 240Ah at 12V) just for Starlink.
- Lithium (LiFePO4): You can discharge lithium to 100%. Therefore, a single 100Ah 12V lithium battery (1,280 Wh) is almost entirely consumed by running Starlink for 24 hours.
Recommendation: If you plan to run Starlink 24/7 alongside a fridge, lights, and laptops, you need a minimum of 200Ah to 300Ah of Lithium batteries.
Sizing the Solar Array
To replace the 1,440 Wh consumed by Starlink every day, you need enough solar panels to generate that power during the limited daylight hours.
Assuming an average of 4 Peak Sun Hours per day: 1,440 Wh ÷ 4 hours = 360 Watts of actual solar production required.
Because solar panels are rarely 100% efficient, you need to over-size the array by about 20-30%.
Recommendation: You need a minimum of 400W to 500W of solar panels dedicated solely to replacing the energy consumed by a 24/7 Starlink connection.
The Inverter Inefficiency Problem
Out of the box, the Starlink router plugs into a standard 120V AC wall outlet.
If you are off-grid, this means you must leave your inverter turned on 24/7 to power the router. This introduces a massive hidden power drain.
An inverter takes 12V DC power from your batteries and converts it to 120V AC power. This conversion process is typically only 85-90% efficient. Furthermore, the inverter itself consumes power simply by being turned on (idle consumption), which can be anywhere from 10W to 30W depending on the size of the inverter.
The Inefficiency Loop:
- Your battery provides 12V DC power.
- The inverter converts it to 120V AC power (losing 10-15% as heat).
- The Starlink router's internal power supply takes that 120V AC power and converts it back to 48V DC power to send up the cable to the dish (losing another 10-15% as heat).
By running Starlink on an AC inverter, you are wasting 20% to 30% of your precious battery power on inefficient conversions.
The Ultimate Solution: The 12V DC Conversion
To eliminate the inverter inefficiency, thousands of off-grid users have successfully modified their Starlink setups to run directly off their 12V DC battery banks.
By bypassing the AC router and the inverter, you can reduce Starlink's power consumption by 20% to 30%, saving hundreds of Watt-hours per day.
How the 12V Conversion Works
The Starlink dish requires 48V DC power, delivered via Power over Ethernet (PoE). To run it off a 12V battery, you need three components:
- A 12V to 48V Step-Up Converter: This takes your battery voltage and boosts it to the 48V required by the dish.
- A PoE Injector: This device injects the 48V power into the Ethernet cable going up to the dish. (Note: Starlink uses a proprietary wiring scheme, so you need a specific "Dishy-compatible" PoE injector, or you must modify the cable).
- A 12V Wi-Fi Router: Because you are bypassing the factory Starlink router, you need a standard 12V Wi-Fi router (like a GL.iNet or Peplink) to broadcast the internet signal to your devices.
Step-by-Step 12V Conversion (Gen 2)
Disclaimer: Modifying your Starlink cable or bypassing the factory router will void your warranty. Proceed at your own risk.
Method 1: The DIY Approach (Cutting the Cable) This method involves cutting the proprietary Starlink cable and crimping a standard RJ45 Ethernet connector onto the end.
- Cut the Starlink cable near the router end.
- Crimp an RJ45 connector using the T-568B wiring standard (ensure you follow guides specifically for Starlink's proprietary wire colors).
- Plug the RJ45 connector into a high-power Gigabit PoE Injector (e.g., Yaosheng 150W).
- Connect the PoE Injector to a 12V-to-48V Step-Up Converter (e.g., 3A or 5A model).
- Wire the Step-Up Converter to your 12V fuse block.
- Connect the LAN port of the PoE Injector to the WAN port of a 12V Wi-Fi router.
Method 2: The Plug-and-Play Approach (No Cutting) Several companies now sell custom adapters that accept the proprietary Starlink plug, eliminating the need to cut the cable.
- Purchase a "Dishy V2 to RJ45 Adapter" (e.g., from Yaosheng).
- Plug the factory Starlink cable into the adapter.
- Plug the adapter into the PoE Injector.
- Wire the PoE Injector to the 12V-to-48V Step-Up Converter.
- Connect a 12V Wi-Fi router.
The Benefits of 12V Conversion
- Massive Power Savings: You can turn your large, inefficient AC inverter off entirely at night or when you aren't using 120V appliances.
- Better Wi-Fi: The factory Starlink router is notoriously weak. By using a custom 12V router, you can get much better range and advanced features (like load balancing or VPNs).
- Space Savings: The 12V components are much smaller than the factory router.
Power Management Strategies for Starlink
If a 12V conversion seems too daunting, or if your solar system is simply too small to support 24/7 operation, you must actively manage your power.
1. Turn It Off When Not in Use
This is the simplest and most effective strategy. If you only need the internet for a few hours of work in the morning and a movie at night, put the Starlink router on a surge protector with a physical switch, or use a smart plug. Turning it off for 12 hours a day instantly cuts your power consumption in half (saving 700+ Wh per day).
2. Use the "Sleep Schedule" Feature
The Starlink app has a built-in "Sleep Schedule" feature. You can program the dish to automatically power down at a specific time (e.g., 11:00 PM) and wake up at another (e.g., 7:00 AM). During sleep mode, the dish draws almost zero power.
3. Disable Snow Melt
As mentioned earlier, ensure the "Snow Melt" feature is set to "Off" rather than "Automatic" if you are operating on a tight power budget in cold weather.
4. Charge Laptops and Phones During the Day
When the sun is shining and your solar panels are producing peak power, charge all your devices. This ensures you aren't drawing power from the batteries at night while Starlink is also running.
Frequently Asked Questions (FAQ)
Can I run Starlink on a 200W solar system?
Only if you use it very sparingly. A 200W solar system will generate roughly 800 Wh per day. A Gen 2 Starlink dish consumes 1,440 Wh per day. You would only be able to run Starlink for 4-6 hours a day before draining your batteries.
Will a Jackery 1000 run Starlink?
A Jackery 1000 (or similar 1,000Wh portable power station) can run a Gen 2 Starlink dish for approximately 12 to 14 hours before the battery is completely dead. If you are using the AC inverter on the Jackery, expect closer to 10-12 hours due to inverter inefficiency.
Does Starlink use more power when downloading heavy files?
Yes, but the difference is relatively small. A Gen 2 dish might idle at 45W, jump to 60W while streaming a movie, and peak at 75W during a massive game download or speed test. The biggest power spike comes from the Snow Melt heater, not data usage.
Can I use a modified sine wave inverter for Starlink?
No. The Starlink router has sensitive electronics that require a Pure Sine Wave inverter. A modified sine wave inverter can cause the router to buzz, overheat, or fail completely.
Conclusion
Starlink is a game-changer for off-grid living, but it demands a robust electrical system. Drawing between 50W and 75W continuously, it requires a significant daily energy budget of roughly 1.5 kWh.
To successfully run Starlink off-grid, you need a minimum of 400W of solar panels and 200Ah of lithium battery storage. If you want to maximize your efficiency and leave your AC inverter turned off, converting the system to run directly on 12V DC power is the ultimate upgrade.
By understanding the power requirements and actively managing your usage through sleep schedules, you can enjoy high-speed internet anywhere in the world without killing your battery bank.
Ready to size a solar system that can handle Starlink and all your other appliances? Head over to our Off-Grid Solar Calculator to build your custom power profile today!


